

Keep reading to see the entire DIY...or to just scroll through some pictures.
I lucked out with this one, I was prepared to have to really clean up some old piece of junk but I found this really cute and CLEAN mini suitcase at a local antique shop and knew it would be perfect right away. And it was only $5 so there was no way I was passing it up!

Step 2: Gather your supplies.
For this project, I used the suitcase, scissors, scotch tape, push pins, small rope, an old book, colored card stock, a pencil, a Sharpie and clothespins.The book was from that same antique store and was about a quarter which was the perfect price for a book I've never heard of and was just going to rip up.

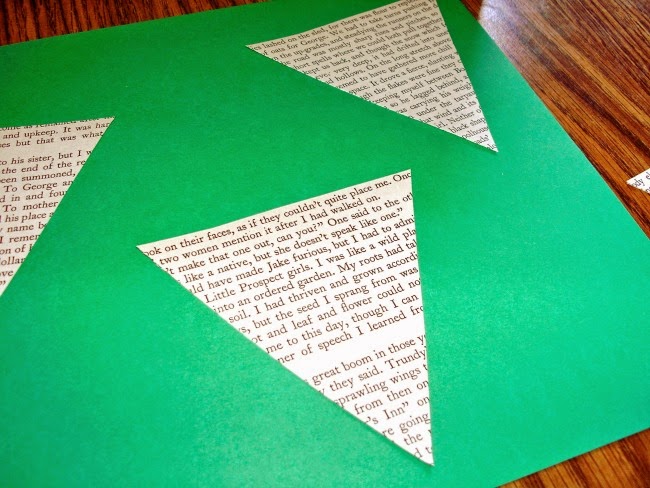
Step 3: Cut your paper & card stock.
I ripped out some of the pages of the book (paying close attention to the pages that had the most writing so the words would cover most, if not all, of the cut-outs). Then taped the pages to card stock and cut around them, to give them just a little pop. I used the two shades of green so that they would match the Marion Claire Stationery logo. (Hello, branding.)
Step 4: Write on your letters.
I just wrote the letters on with pencil first and then traced over them with Sharpie, but you could use stencils too. I like the more messy look of my handwriting though. Makes it look like it's 'mine.'

Step 5: Clothespin your letters on.
That was easy. Getting a suitcase with a little pocket made this really convenient.

Step 6: Repeat steps 1-5 for lower half.
Of course, depending on your design, you might not do this. But since the slogan of Marion Claire Stationery is "cards with heart & sass" I felt it was appropriate to put this on there as well.

Step 7: Add boxes to prop up your product.
Also depending on your design, but since my cards were drowning in the bottom of this suitcase, I decided to prop them up a little. I got a box that fit the best and then stuffed some crumbled up book pages in the small space that was left to make it snug and then covered it all with the green card stock.

Step 8: Add your products and display pieces and admire.
I added a business card holder between the two rows of cards to keep them apart so they weren't all messy and falling into each other and to have a place to put business cards...duh.


And there you have it! I'm excited to get this all sent off to Dewdrop Gift and Tea Shop and see how it fits in with their cute and eclectic space. If you're in the Monaca, Pa area feel free to stop by the shop and soon pick up some Marion Claire Stationery goodies!

that is pretty cool!
ReplyDeleteLove this!! I would totally make this just to show off my prettiest books in my home!
ReplyDelete~Sara
That box is seriously adorable. Great DYI idea Chelsea!
ReplyDeleteThanks, Mark!
ReplyDeleteThat's a great idea! Especially since you're hiding books under your bed lol
ReplyDeleteThanks, Lauren!!
ReplyDeleteIt's so cute, and could easily be used for so many different things!
ReplyDeleteThanks!
ReplyDelete